
How to enable WooCommerce Coupons #
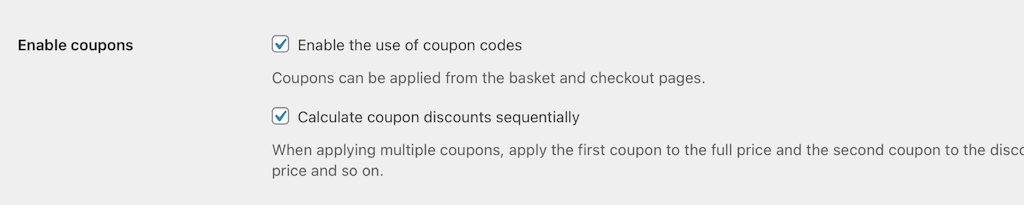
To activation coupons go to WooCommerce in the left-hand menu, select Settings and then select General tab.
Now you need to enable coupons by ticking the checkbox.
Adding WooCommerce Coupons #
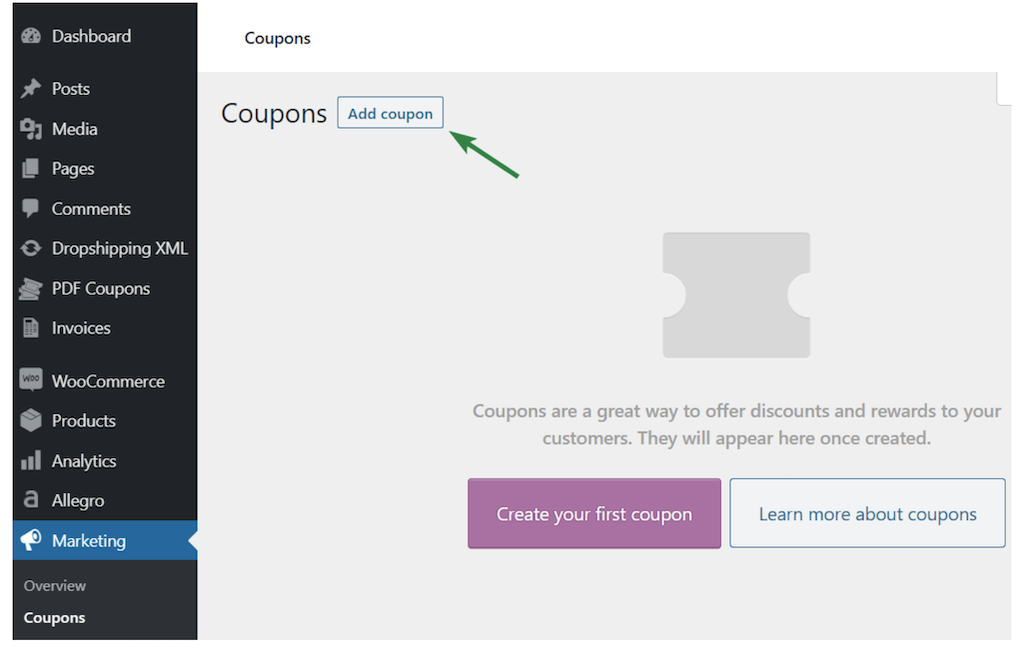
Go to the left hand menu Marketing → Coupons and then select the Add coupon button.
To add your coupon fill in the following:
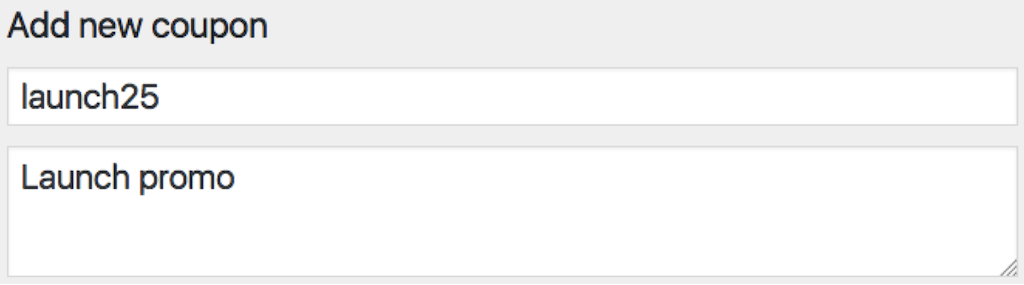
Coupon code – this is a discount code entered by the customer in the cart.
Description – in this field you can add some information about your coupon, with as many details as you need. The description is only visible in the admin panel.
Even though the description is optional, it’s good to use it.
If you have multiple promotions or marketing campaigns it will help you identify the coupon after a few weeks or months.
General settings #
Discount type #
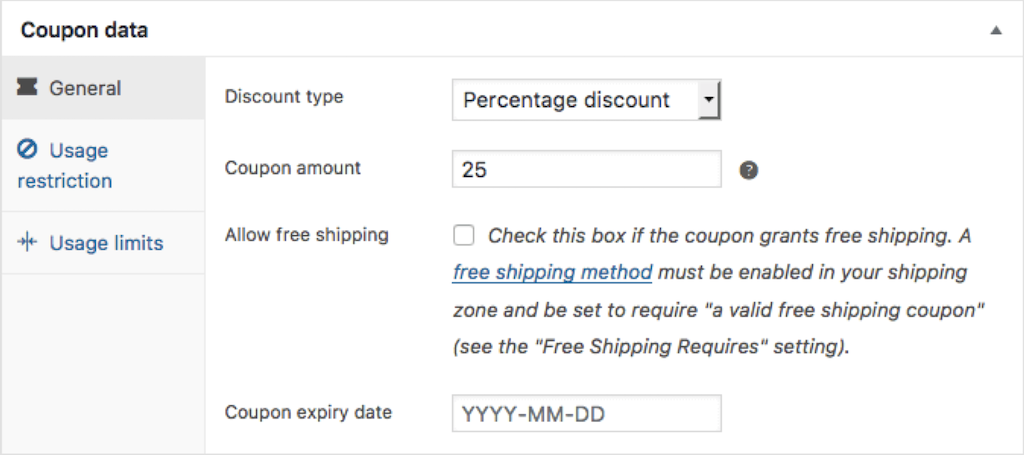
- Percentage discount – a type of discount used when the item is discounted by a percent of the original price (for instance, a 20% off coupon)
- Fixed cart discount – it’s a fixed value discount for the entire cart. For instance, it could be a coupon worth $100
- Fixed product discount – a fixed discount for selected product only
Coupon amount #
Enter the coupon value as an amount or by percentage, depending on discount type you choose.
Use a decimal system appropriate for your shop’s locale.
Don’t use the currency or percent sign – just enter the number.
- Allow free shipping – check this box if you want to offer your customers a free shipping coupon.
However remember to enable the Free Shipping voucher option in WooCommerce → Settings → Free Shipping → Free Shipping requires. - Coupon expiry date – optionally select the day when the coupon is no longer active.
Usage restriction #
Here you can set a limit for selected products, categories or email addresses.
This configuration is optional, so you don’t have to restrict the coupon usage.
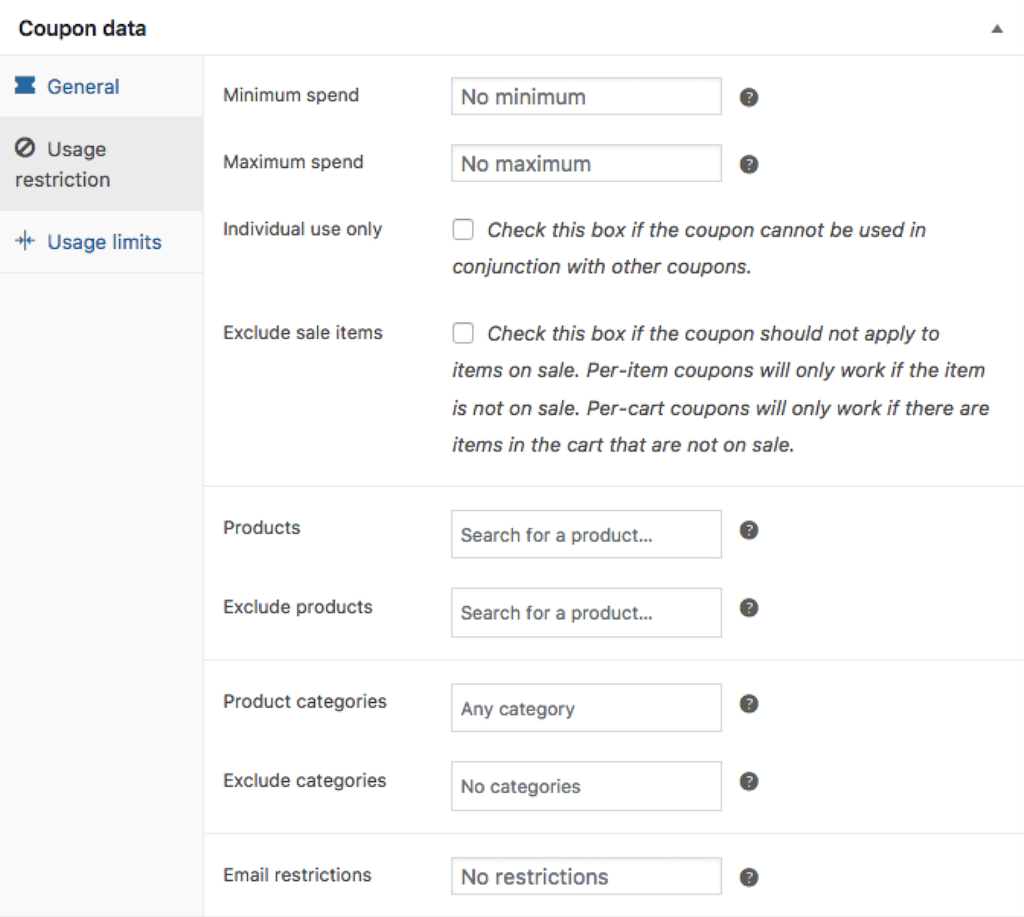
Minimum/maximum spend – this option allows you to enter the minimum or maximum value of your coupon order (which is a subtotal needed to use the coupon).
Remember that the amount is set before tax calculation.
Individual use only – check this option if you don’t want the discount to be used in combination with other coupons.
Exclude sale items – tick this checkbox if the coupon can’t be applied to products on sale.
Products – select a list of products that the coupon will be applied to. Start typing to auto find a product.
Exclude products – select the products to which the discount won’t be applied.
Product categories – select the whole categories that will be eligible for the discount. Start typing to auto find a category.
Exclude categories – this option allows you to select the categories to which the discount won’t be applied.
Email restrictions – enter the email addresses that can use the coupons. If you want to add more than one email addresses, separate them with a comma.
Usage limits #
Here you can set usage limit for your coupon.
This configuration is also optional, so decide yourself whether you want to use it or not.
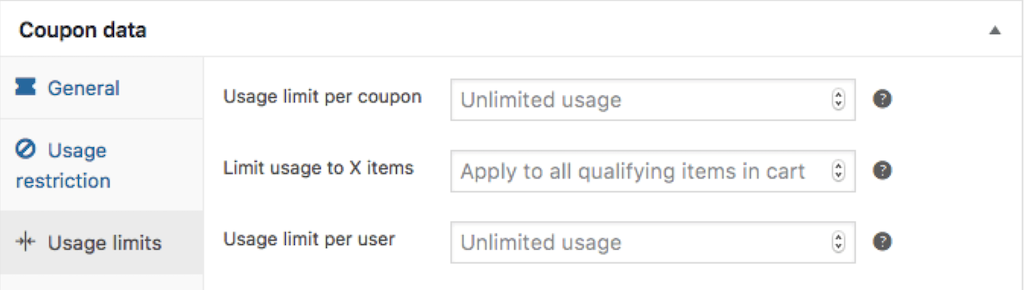
Usage limit per coupon – specify how many times the coupon can be used before it expires.
Limit usage to X items – enter the maximum number of items the coupon can be applied to (for product discounts).
Usage limit per user – specify how many times each customer can use the coupon.