
For the Incoming/IMAP and Outgoing/SMTP server details please see the article titled “Hosted Email Server Settings”
Outlook #
Microsoft have a walkthrough on setting up email in Outlook that covers a range of versions going back many years incase the below doesn’t apply to your version which you can access at:
Classic Outlook:
https://support.microsoft.com/en-us/office/add-an-email-account-to-outlook-for-windows-6e27792a-9267-4aa4-8bb6-c84ef146101b#picktab=classic_outlook
What version of Outlook do I have?
With so many Outlook apps and services, it can be confusing to know which version you’re using.
To find out which version of Outlook you’re using, select a tab from the Help page:
https://support.microsoft.com/en-gb/office/what-version-of-outlook-do-i-have-b3a9568c-edb5-42b9-9825-d48d82b2257c
Walk-through:
- In Outlook, choose the File tab
- Under ‘Account Information’, choose ‘Add Account’
- Enter the required EMail IMAP/SMTP server details and the account username/password you created
- If asked ensure to select IMAP rather than POP as the account type.
- When setting up your account, please choose More Settings > Outgoing Server and check the box for ‘My outgoing server (SMTP) requires authentication‘.
- If you experience any problems with the connection or receive a certificate warning, please disable SSL/TLS encryption and change the incoming server port to 143.
Windows Mail #
You can view a walkthrough on setting up email in Windows Mail via Microsoft’s website:
https://support.microsoft.com/en-us/office/set-up-email-in-the-mail-app-for-windows-10-7ff79e8b-439b-4b47-8ff9-3f9a33166c60
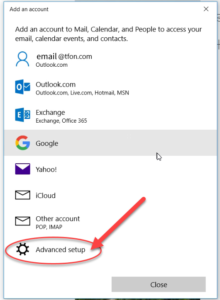
- In the first window when it asks for the email account type, scroll down and select ‘Advanced setup’ and then complete the Mail server details on the following screen
- If asked ensure to select IMAP rather than POP as the account format/type
Android #
- Open the mail application on your Android device
- Go to Settings
- Select Add New Account and enter the mailbox name and it’s password.
- Select Manual Setup and select IMAP Account.
- Enter the required EMail IMAP/SMTP server details and the account username/password you created.
- The Username will need to be the same as the mailbox name.
- Select ‘Sign In’ and the mailbox will be added to your Android.
iPhone/iPad #
- Head to Settings
- Select Mail
- In the right hand side select Accounts
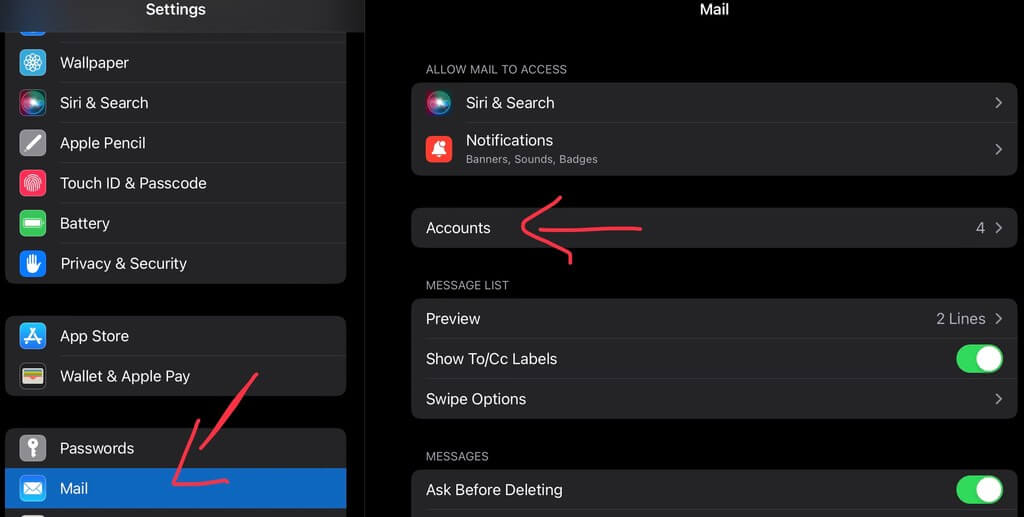
- When the Accounts screen appears select ‘Add Account‘
- On the ‘Add Account’ screen select Other from the list
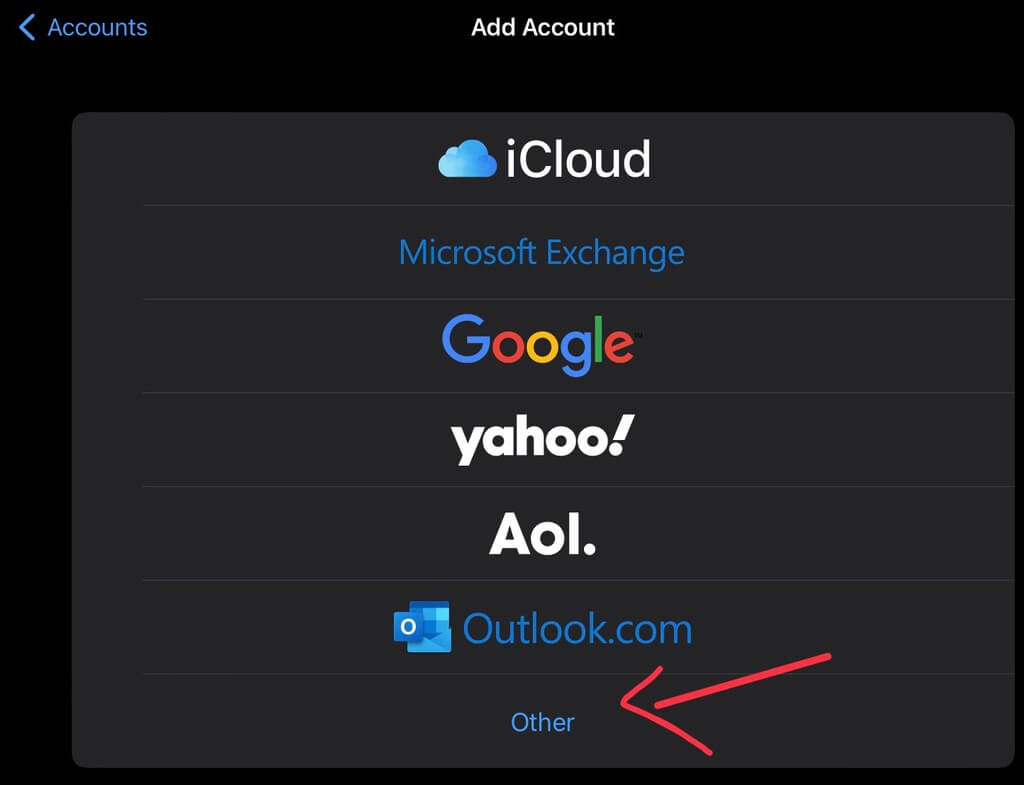
- On the next screen select Add Mail Account
- Enter the required EMail IMAP/SMTP server details and the account username/password you created
- Finally, select the email account and go into the Outgoing Mail Server settings.
- Select Primary Server, make sure SSL is switched on and the port is set to 587
Cannot verify server identity warning #
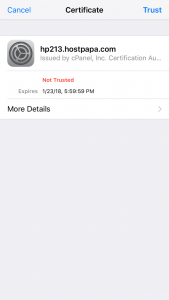
- If when using an iPhone/iPad you receive a ‘Cannot verify server identity’ warning, select “Details” in the pop up message
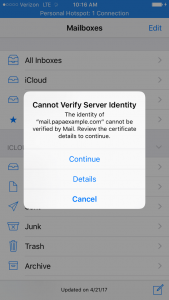
- and then when you go through to the “Certificate” page, select “Trust” from the top right hand corner.
Why are the IMAP folders missing from my iPhone or iPad? #
If you can successfully send email and view any new messages in your Inbox, but aren’t able to view additional subfolders, then it’s likely that you have an incorrect IMAP Path Prefix setting on the device.
To correct this, take the following steps:
- Go to Settings > Mail > Accounts > Select your e-mail address > Account > Advanced
- At the bottom of this screen, you should see ‘IMAP Path Prefix‘.
Leave this blank or, try entering ‘INBOX’ - Save the changes, and then navigate back through the Email Account settings pages saving as required
You’ll now be able to view all folders in the account. If that doesn’t help or it’s already set up like that, you may need to remove and re-add the e-mail account on your device.